

table of content:
- Why Are No-Equipment Workouts So Effective? (Key Benefits)
- Push-Ups: The Secret to Building Muscle Without Equipment!
- Pull-ups: The Ultimate Exercise for Muscle Growth and Strength!
- Squats: The King of Muscle-Building and Strength Training!
- Lunges: The Ultimate Exercise for Strong, Toned, and Muscular Legs!
- Triceps Dips: A Powerful Exercise for Muscle Growth and Strength
- Plank: An Amazing Exercise for Strengthening Core Muscles and Sculpting Your Abs!
- What People Who Tried This Method Are Saying! (Social Proof)
The Secret to Building Muscle at Home: Get Stronger Without Equipment and Build Your Dream Body!
🚀 No Weights, No Gym, Maximum Results!
Do you think you must go to the gym and lift heavy weights to build big, strong muscles?
The truth is, your body is a complete gym on its own! You can build strong, well-defined, and resilient muscles without the need for dumbbells, barbells, or any equipment.
How? By using smart, science-backed bodyweight exercises that stimulate muscle growth using your own weight.
🏆 Whether you’re a beginner or a seasoned athlete, these workouts are designed for all fitness levels—and the results are guaranteed!
The Secret to Success: How to Build Muscle at Home?
📌 Imagine:
- ✔️ Becoming stronger, more energetic, and more confident every day.
- ✔️ Achieving a muscular, well-defined body in less than 30 minutes a day.
- ✔️ Using proven techniques recommended by top athletes and trainers.
- ✔️ Seeing remarkable changes in your body—without expensive equipment or gym memberships.
This isn’t just a dream! This is exactly what thousands of people worldwide have achieved—and you can start today!
Don’t Miss Out on the Latest Trends! 
Follow us on TikTok for exclusive gift ideas, trends, and inspiration! 


Why Are No-Equipment Workouts So Effective? (Key Benefits)

💡 Many believe that without weights and gym machines, building muscle is impossible—but this is a myth! Science proves that bodyweight training can be just as effective as traditional weightlifting in stimulating muscle growth.
- 🔹 Greater Muscle Activation – Exercises like push-ups, pull-ups, dips, and squats engage multiple muscle groups, whereas machine-based exercises often isolate just one.
- 🔹 Improved Functional Strength – Bodyweight movements like planks, push-ups, and lunges enhance not just strength and endurance but also balance, coordination, and flexibility.
- 🔹 Lower Risk of Injury – Heavy weights put stress on joints, but bodyweight exercises reduce injury risks while still applying optimal muscle tension.
- 🔹 Workout Anytime, Anywhere – Whether at home, in a park, or even at work, you can train without needing extra equipment!
The Result? You can build strong, sculpted, and endurance-packed muscles using just your bodyweight!
Proven Home Workout Plan for Muscle Growth
✅ 1. Push-ups – The #1 move for chest, shoulders, and triceps.
✅ 2. Pull-ups – An essential exercise for upper body strength and back development.
✅ 3. Squats – A fundamental move to strengthen legs, glutes, and core.
✅ 4. Lunges – Great for balance, leg power, and flexibility.
✅ 5. Triceps Dips – The best way to build bigger triceps and a stronger chest.
✅ 6. Planks – One of the most effective exercises for a strong core and abs.
Perform 3-4 sets of 10-15 reps per exercise, gradually increasing intensity each week for amazing results!
Push-Ups: The Secret to Building Muscle Without Equipment!
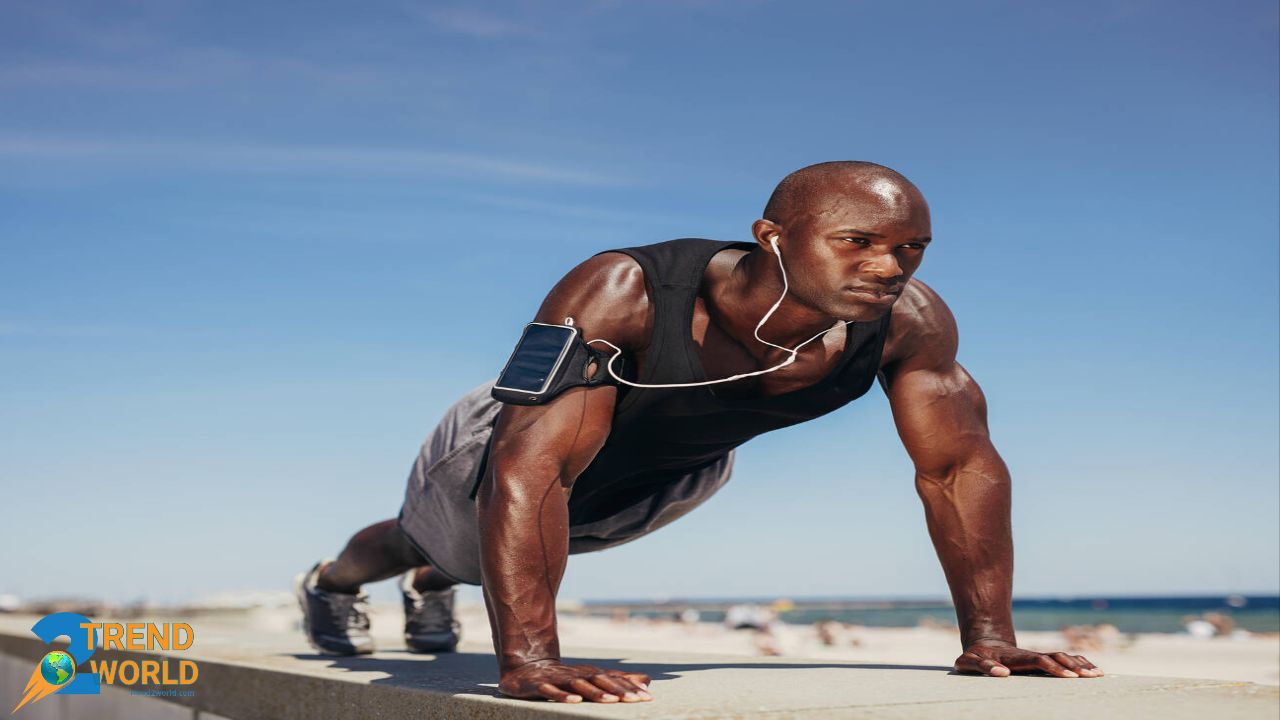
Push-ups are one of the most effective and widely used exercises that maximize strength, endurance, and muscle growth—all without requiring any equipment. This timeless movement, which has been a staple in the training routines of athletes, military personnel, and bodybuilders for centuries, is a compound and multi-joint exercise that engages multiple muscle groups simultaneously.
But why are push-ups so popular and effective?
In this article, we’ll cover the benefits, proper technique, common mistakes, variations, and advanced training methods to make your push-ups more intense and effective.
Benefits of Push-Ups
✅ 1. Engages Multiple Muscle Groups
Push-ups are one of the best exercises for strengthening the upper body, working several muscles at once:
- Pectoral Muscles (Chest): The primary muscles activated during push-ups, helping increase chest size and strength.
- Triceps (Back of the Arms): A key movement for building bigger and stronger arms.
- Deltoid Muscles (Shoulders): Especially the front deltoid is heavily engaged throughout the movement.
- Core Muscles (Abs & Lower Back): Push-ups aren’t just an upper-body workout! To maintain proper posture, the abs, obliques, and lower back muscles are also activated.
- Glute Muscles (Buttocks): The glutes help stabilize the body throughout the movement.
✅ 2. Increases Strength and Muscular Endurance
Push-ups are a strength and endurance exercise, helping you build muscle mass while improving stamina.
✅ 3. Improves Heart and Cardiovascular Health
Push-ups are a hybrid exercise that combines strength and cardio. They increase heart rate and circulation, making them an excellent fat-burning and endurance-boosting workout.
✅ 4. Enhances Posture and Muscle Definition
Proper execution of push-ups strengthens the back muscles, preventing slouching and shoulder misalignment.
✅ 5. Strengthens Joints and Improves Flexibility
Push-ups help fortify the stabilizing muscles around the shoulders, elbows, and wrists, reducing the risk of injury and increasing joint resilience.
✅ 6. Can Be Done Anytime, Anywhere!
One of the biggest advantages of push-ups is their accessibility—no equipment needed! You can do them at home, in the park, at work, or even while traveling.
How to Perform the Perfect Push-Up: Step-by-Step Guide
To maximize your gains and avoid injury, proper form is crucial. Poor execution can reduce effectiveness and increase injury risk.
1-1 Proper Body Positioning
- Place your hands slightly wider than shoulder-width on the ground.
- Slightly turn your fingers outward to reduce wrist strain.
- Keep your body in a straight line from head to heels (avoid arching your back or lifting your hips too high).
1-2 Lowering the Body
- With full control, bend your elbows and lower your body towards the ground.
- Your chest should nearly touch the floor without collapsing.
- Keep your elbows at approximately a 45-degree angle to avoid shoulder strain.
1-3 Pushing Back Up
- Push through your palms and extend your arms to return to the starting position.
- Breathe properly: Inhale on the way down, and exhale as you push up.
Common Push-Up Mistakes (and How to Fix Them!)
🚫 1. Raising Your Hips Too High
❌ Lifting your hips takes the load off your chest and arms, reducing effectiveness.
✅ Fix: Keep your body straight like a plank.
🚫 2. Arching or Dropping Your Lower Back
❌ Dropping your lower back can lead to spinal injuries.
✅ Fix: Engage your core muscles to keep your spine aligned.
🚫 3. Flaring Your Elbows at 90 Degrees
❌ This puts unnecessary stress on your shoulders, increasing injury risk.
✅ Fix: Keep your elbows at a 45-degree angle to your torso.
🚫 4. Performing Push-Ups Too Fast
❌ Doing them too quickly reduces muscle engagement and increases injury risk.
✅ Fix: Perform push-ups slowly and with control to maximize muscle activation.
Push-Up Variations to Increase Training Intensity
✅ 1. Standard Push-Ups – The basic movement, engaging all primary muscles.
✅ 2. Diamond Push-Ups – Targets triceps and inner chest more intensely.
✅ 3. Archer Push-Ups – Excellent for building unilateral strength and endurance.
✅ 4. Plyometric (Explosive) Push-Ups – Boosts power and fast-twitch muscle activation.
✅ 5. One-Arm Push-Ups – A challenging variation for advanced athletes.
✅ 6. Incline/Decline Push-Ups – Changes focus to upper or lower chest muscles.
Push-Up Training Plan for Strength Gains
- 🔹 Week 1-2: 3 sets of 10 reps
- 🔹 Week 3-4: 4 sets of 15 reps
- 🔹 Week 5-6: 5 sets of 20 reps
- 🔹 After Week 6: Increase intensity by adding push-up variations
30-Day Push-Up Challenge: Transform Your Body!
💡 If you want to build strength and endurance quickly, try this 30-day push-up challenge!
- ✅ Days 1-5: 20 push-ups per day
- ✅ Days 6-10: 30 push-ups per day
- ✅ Days 11-20: 40 push-ups per day
- ✅ Days 21-30: 50 push-ups per day
The result? A stronger upper body, bigger muscles, and incredible endurance!
Conclusion: Are You Ready to Transform Your Body with Push-Ups?
- ✔️ A simple yet incredibly effective exercise for building muscle
- ✔️ No equipment needed—do it anywhere, anytime
- ✔️ Suitable for all fitness levels—from beginners to advanced
- ✔️ Fast and real results—with just 30 minutes a day!
Start today and build your dream physique! 🚀💪
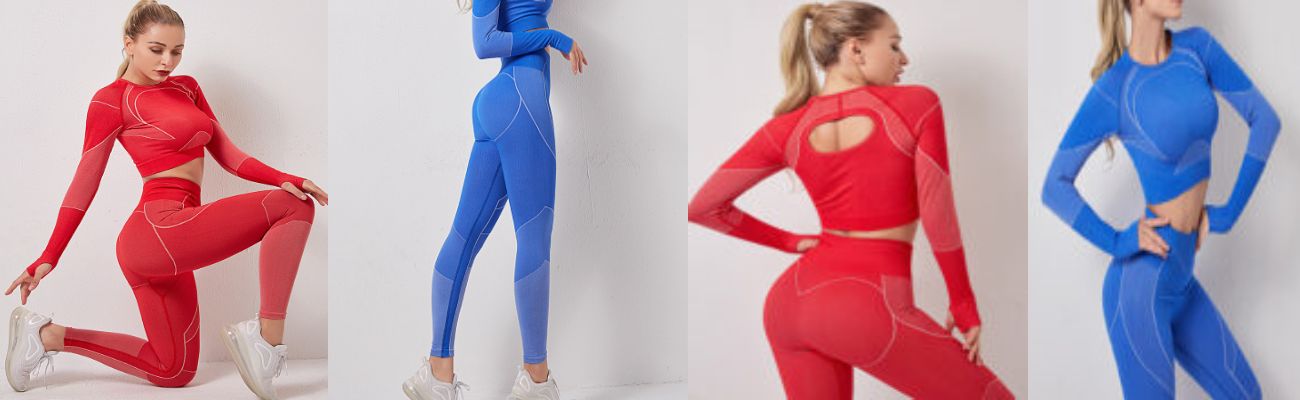
Our recommended product for you to have the best yoga experience – click on the image below!
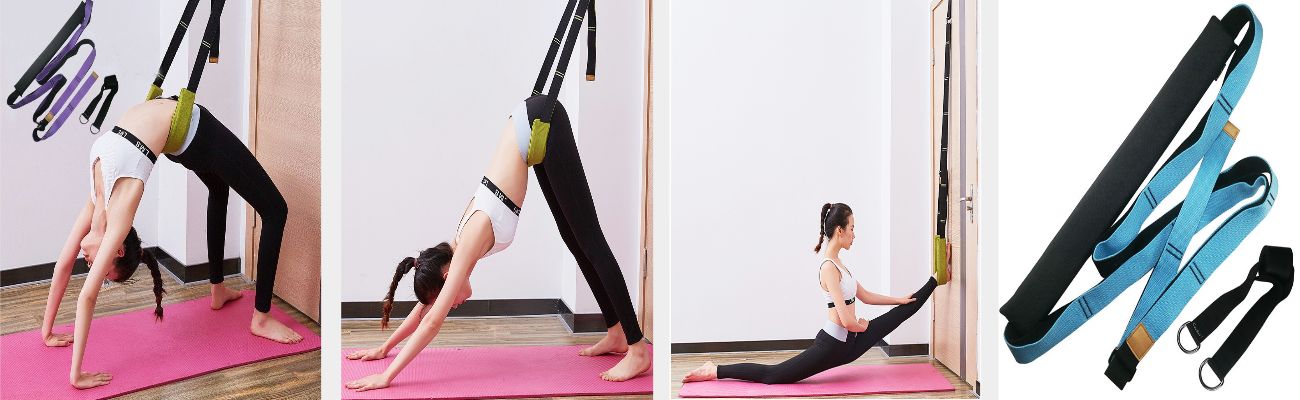
 Trending Home! Our top fitness, health, and yoga picks are flying off the shelves—don’t miss out!
Grab yours before it’s too late!

Pull-ups: The Ultimate Exercise for Muscle Growth and Strength!
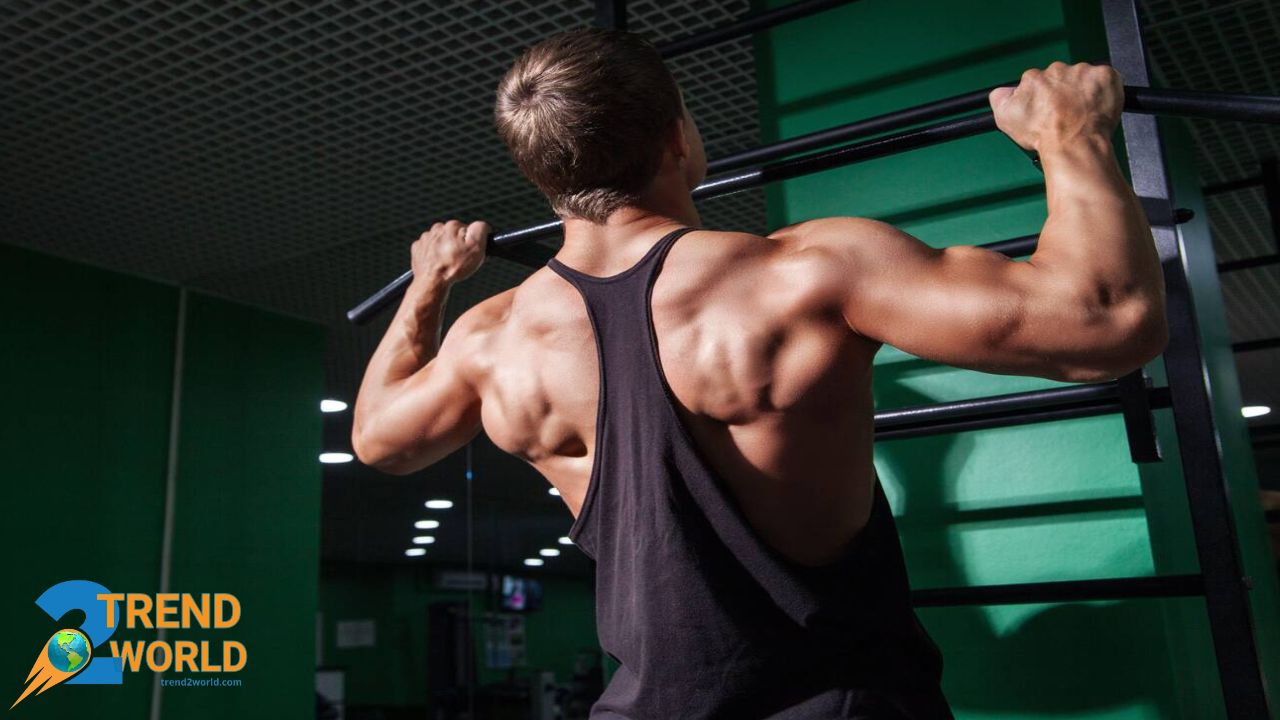
💪 Want to build stronger, bigger back, arm, and shoulder muscles? Pull-ups are the best exercise for you!
Pull-ups are one of the most effective bodyweight exercises that have been a staple in the training routines of professional athletes, bodybuilders, and even military forces for years. This movement is known as the king of upper-body exercises because it engages multiple muscles simultaneously, promoting not only muscle growth but also strength and endurance.
In this article, we’ll cover everything about pull-ups, including their benefits, proper execution, common mistakes, different variations, methods for improvement, and workout programs to help you progress faster.
Why Are Pull-ups One of the Best Exercises?
✅ 1. Engages Multiple Muscle Groups Simultaneously
Pull-ups are a compound movement that activates various muscle groups, including:
- Latissimus Dorsi (Lats): The widest back muscles that grow and strengthen through pull-ups.
- Trapezius (Traps): Located in the upper back and shoulders, helping stabilize the body.
- Biceps Brachii: One of the best exercises for strengthening the biceps.
- Forearm Muscles: The forearms are heavily engaged during pull-ups.
- Core Muscles: The abs and lower back muscles work to maintain body stability.
✅ 2. Increases Strength and Muscle Endurance
Pull-ups not only enhance muscle mass but also significantly boost upper-body strength and endurance.
✅ 3. Improves Posture and Body Alignment
Regular pull-ups help improve posture by strengthening the back and shoulders, preventing slouching.
✅ 4. Great for Grip Strength
Grip strength is crucial for activities like weightlifting, rock climbing, and daily tasks. Pull-ups are excellent for building a powerful grip.
✅ 5. No Expensive Equipment Required
All you need for pull-ups is a sturdy bar! You can do them at home, in a park, or at the gym.
✅ 6. Burns Fat and Boosts Metabolism
Pull-ups are both a strength and calorie-burning exercise, helping reduce excess fat when combined with other workouts.
How to Perform Pull-ups Correctly: Step-by-Step Guide
2-1 Grip the Bar Properly
- Place your hands slightly wider than shoulder-width apart.
- Your palms can be facing outward (Overhand Grip) or inward (Underhand Grip).
2-2 Engage Muscles and Start the Movement
- Keep your body fully extended.
- Tighten your core to prevent swinging.
2-3 Pull Your Body Up
- Use your back and arm muscles to lift your body.
- Your chin should go above the bar.
- Exhale while pulling up and contract your muscles completely.
2-4 Controlled Lowering
- Slowly lower your body back to the starting position.
- Inhale during this phase and avoid dropping suddenly.
Common Pull-up Mistakes (and How to Fix Them)
🚫 1. Using Momentum and Swinging the Body
❌ Swinging takes the tension off the target muscles.
✅ Keep your body under full control and avoid cheating techniques.
🚫 2. Not Bringing the Chin Above the Bar
❌ Partial reps reduce the effectiveness of the exercise.
✅ Ensure your chin clears the bar for full muscle engagement.
🚫 3. Locking the Elbows at the Bottom
❌ Locking the elbows can strain the joints.
✅ Keep a slight bend in the elbows at the lowest point.
🚫 4. Rushing Through Repetitions
❌ Fast, uncontrolled reps reduce muscle activation and increase injury risk.
✅ Perform each rep slowly and with control.
Different Pull-up Variations for Progression
✅ 1. Standard Pull-ups (Overhand Grip): Hands shoulder-width apart, palms facing away.
✅ 2. Chin-ups (Underhand Grip): Palms facing inward, emphasizing the biceps.
✅ 3. Wide-Grip Pull-ups: Puts more focus on the back muscles.
✅ 4. Behind-the-Neck Pull-ups: A challenging variation requiring shoulder flexibility.
✅ 5. One-arm Pull-ups: For advanced athletes looking to increase unilateral strength.
✅ 6. Explosive Pull-ups (Clap Pull-ups): Pulling up fast enough to clap before grabbing the bar again.
Recommended Pull-up Progression Plan
- 📅 Weeks 1-2: 3 sets of 5 reps
- 📅 Weeks 3-4: 4 sets of 8 reps
- 📅 Weeks 5-6: 5 sets of 10 reps
- 📅 After 6 Weeks: Incorporate different pull-up variations for increased intensity
30-Day Pull-up Challenge: Are You Ready?
- 🎯 Day 1-5: 5 reps per day
- 🎯 Day 6-10: 10 reps per day
- 🎯 Day 11-20: 15 reps per day
- 🎯 Day 21-30: 20 reps per day
✅ The Result? Stronger muscles, a more sculpted body, and enhanced endurance!
Conclusion: Why You Should Add Pull-ups to Your Routine
- ✔️ The best exercise for upper-body strength
- ✔️ No expensive equipment needed
- ✔️ Builds bigger back, arm, and shoulder muscles
- ✔️ Enhances endurance and burns fat efficiently
🎯 Start today and challenge your true strength! 💪🔥
Squats: The King of Muscle-Building and Strength Training!
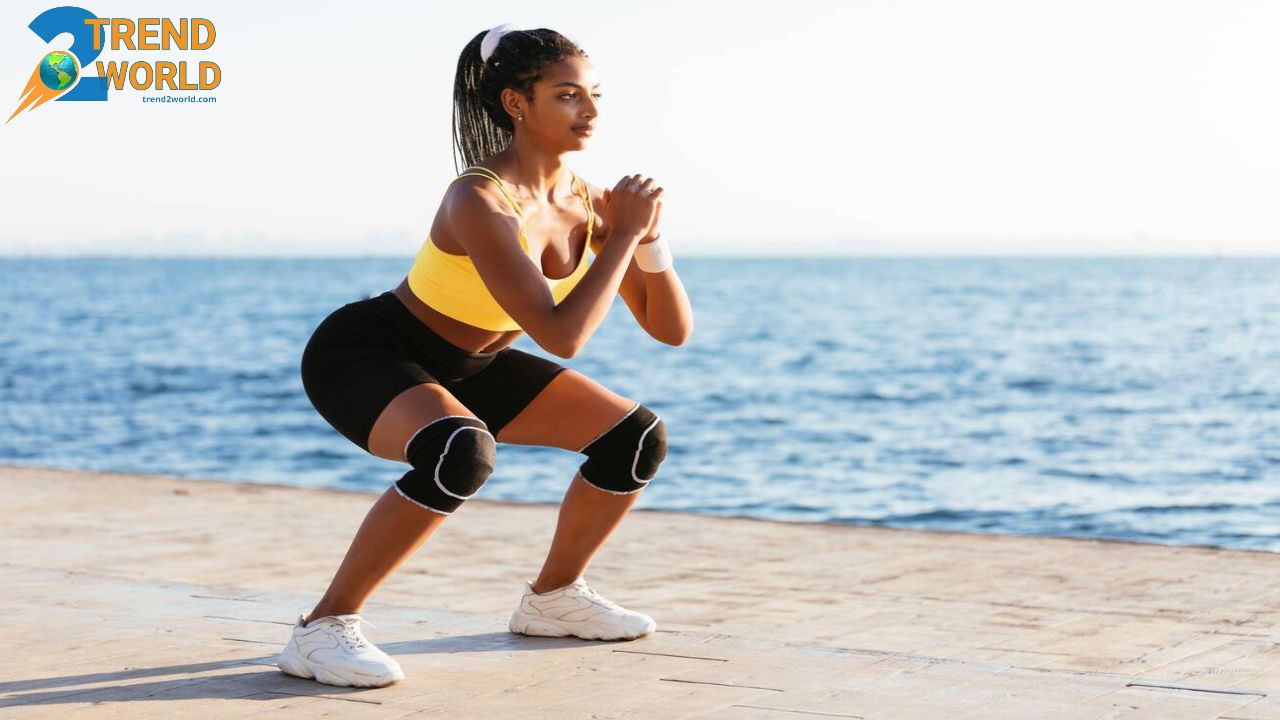
Do you want stronger legs, muscular glutes, and a well-shaped body?
The squat is the ultimate key to muscle growth and strength!
Squats are one of the most effective and powerful strength exercises, known for their incredible impact on the entire body, especially the lower body. Because they engage multiple muscle groups simultaneously, squats are considered the “king of exercises” and are a fundamental movement in bodybuilding, CrossFit, and strength training.
In this article, we will cover everything about squats, from their benefits, proper technique, and common mistakes to different squat variations, intensity-boosting methods, and suggested workout plans. Let’s dive in!
Why Are Squats So Important?
✅ 1. Engage Multiple Muscle Groups at Once
Squats are a compound movement that activates several major muscle groups, including:
- Quadriceps: The front thigh muscles responsible for knee extension.
- Hamstrings: The muscles at the back of the thigh, essential for knee flexion and hip stability.
- Glutes: Squats help strengthen and build your glutes effectively.
- Adductors: Inner thigh muscles that assist with balance during movement.
- Core Muscles (Abs & Lower Back): Squats heavily engage the core for body stabilization.
✅ 2. Increased Lower Body Strength and Endurance
Regular squats build strength, endurance, and muscle mass in your lower body, enhancing athletic performance.
✅ 3. Boosts Testosterone and Growth Hormones
Since squats activate large muscle groups, they naturally increase testosterone and growth hormone levels, promoting overall muscle growth.
✅ 4. Fat Burning and Metabolism Boost
Squats are both a strength and cardio-based exercise that elevate your heart rate, increasing metabolism and promoting fat loss.
✅ 5. Improved Athletic Performance and Joint Stability
Squats not only strengthen muscles but also improve knee, hip, and ankle stability, reducing injury risks.
✅ 6. No Need for Expensive Equipment
Squats can be done anywhere without equipment, or you can add weights (dumbbells, barbells, kettlebells) to increase intensity.
Proper Squat Technique: Step-by-Step Guide
3-1 Initial Position
- Stand with your feet shoulder-width apart.
- Point your toes slightly outward.
- Keep your spine straight and shoulders back.
3-2 Lowering Phase
- Push your hips back while bending your knees.
- Keep your back straight and avoid hunching.
- Your knees should not go beyond your toes.
3-3 Going Down
- Lower yourself until your thighs are parallel to the ground.
- If possible, go deeper for a full-depth squat.
3-4 Pushing Back Up
- Push through your heels to stand back up.
- Do not lock your knees at the top—keep them slightly bent.
- Take a deep breath and repeat.
Common Squat Mistakes (And How to Fix Them)
🚫 1. Knees Moving Too Far Forward
❌ If your knees extend past your toes, it puts excessive stress on the joints.
✅ Push your hips back and keep your weight on your heels.
🚫 2. Rounding Your Back
❌ A rounded back can lead to spinal injuries.
✅ Keep your back straight and engage your core.
🚫 3. Incorrect Foot Positioning
❌ Feet too close or too wide reduce squat effectiveness.
✅ Keep feet slightly wider than shoulder-width apart.
🚫 4. Rising on Your Toes Instead of Heels
❌ If your weight shifts to your toes, you lose balance.
✅ Always push through your heels.
🚫 5. Rushing the Reps
❌ Performing squats too fast reduces muscle engagement.
✅ Perform slow, controlled reps for maximum benefits.
Squat Variations to Increase Intensity
✅ 1. Bodyweight Squat – The basic squat without weights.
✅ 2. Dumbbell Squat – Adds resistance to increase difficulty.
✅ 3. Barbell Back Squat – Best for building strength and size.
✅ 4. Front Squat – Emphasizes quadriceps more than regular squats.
✅ 5. Bulgarian Split Squat – A single-leg squat that improves balance and endurance.
✅ 6. Goblet Squat – Great for beginners, using a dumbbell in front of the chest.
✅ 7. Jump Squat – Enhances explosive power and burns more calories.
Suggested Workout Plan for Squat Progression
- 🔹 Week 1-2: 3 sets, 12 reps per set
- 🔹 Week 3-4: 4 sets, 15 reps per set
- 🔹 Week 5-6: 5 sets, 20 reps per set
- 🔹 After 6 weeks: Incorporate squat variations for added intensity
30-Day Squat Challenge: Are You Ready?
- 🎯 Days 1-5: 30 squats per day
- 🎯 Days 6-10: 50 squats per day
- 🎯 Days 11-20: 70 squats per day
- 🎯 Days 21-30: 100 squats per day
✅ Result? Stronger legs, bigger glutes, and amazing endurance!
Conclusion: Why You Should Add Squats to Your Routine
- ✔️ One of the best full-body exercises
- ✔️ No expensive equipment required
- ✔️ Builds muscle, strength, and endurance
- ✔️ Promotes fat loss and body transformation
🎯 Start today and build your dream body! 💪🔥
Lunges: The Ultimate Exercise for Strong, Toned, and Muscular Legs!
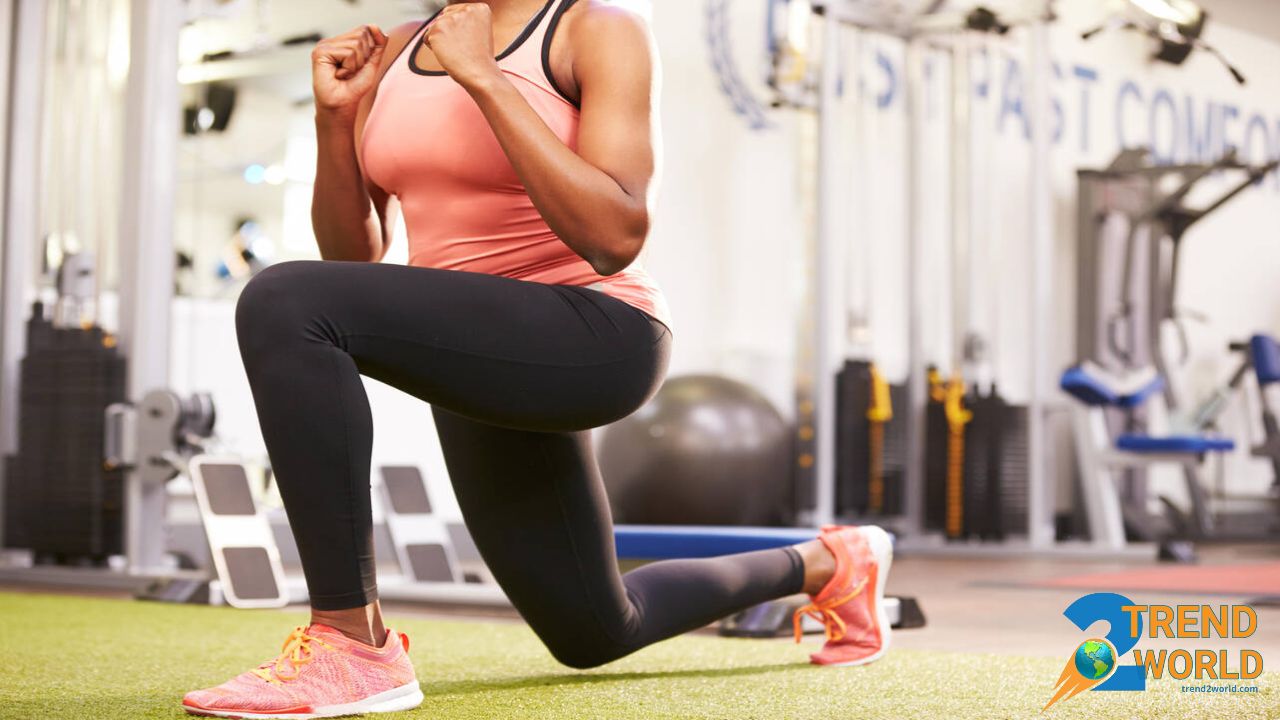
Are you looking to strengthen and shape your lower body muscles?
Do you want to tone your thighs and glutes effectively?
Lunges are one of the best exercises for increasing strength, balance, and flexibility in your legs!
Lunges are an effective workout that targets the quadriceps, hamstrings, glutes, calves, and core muscles. This movement, widely used by professional athletes, bodybuilders, and even runners, enhances balance, stability, and muscular endurance while strengthening the knee and hip joints.
In this article, we will explore everything about lunges: from their benefits, proper execution, common mistakes, and variations, to methods for increasing intensity, recommended workout plans, and techniques to improve performance and prevent injuries.
Why Are Lunges One of the Best Lower-Body Exercises?
✅ 1. Activation of Multiple Muscle Groups Simultaneously
Lunges are a compound exercise that engages several muscles, including:
- Quadriceps: The primary muscles involved in lunges, responsible for knee extension.
- Hamstrings: Located at the back of the thigh, aiding knee and hip movement.
- Glutes: Lunges significantly strengthen and shape the glute muscles.
- Adductors: The inner thigh muscles help with balance during movement.
- Calves: Assist in maintaining stability while performing lunges.
- Core Muscles: The abs and lower back engage to control the body and prevent falling.
✅ 2. Improves Balance and Coordination
Lunges are a single-leg exercise that requires high levels of balance and coordination. Regular practice enhances body control and muscular stability.
✅ 3. Increases Lower-Body Strength and Endurance
This movement places intense stress on the leg muscles, leading to greater strength and muscular endurance.
✅ 4. Enhances Athletic and Daily Performance
Lunges not only improve athletic performance in sports like running, football, basketball, and cycling but also make daily activities such as climbing stairs or running easier.
✅ 5. No Special Equipment Required
You can perform lunges at home, in the gym, or even outdoors without any equipment. For added intensity, you can use dumbbells, a barbell, or resistance bands.
✅ 6. Strengthens Knee and Hip Joints & Reduces Injury Risk
Properly executing lunges helps strengthen the knee and hip joints, reducing the risk of knee injuries.
How to Perform Lunges Correctly: Step-by-Step Technique
4-1 Starting Position
- Stand with your feet shoulder-width apart.
- Keep your spine straight, shoulders back, and engage your core.
4-2 Stepping Forward
- Take a big step forward with one foot.
- Shift your weight onto the heel of the front foot.
4-3 Lowering Down
- Bend the front knee to form a 90-degree angle.
- The back knee should also bend and nearly touch the floor.
- Note: The front knee should not go past the toes.
4-4 Returning to the Starting Position
- Push through the heel of the front foot to rise back up.
- Return to the standing position and repeat with the other leg.
4-5 Repetition Guide:
- Beginners: 3 sets of 10 reps per leg
- Intermediate: 4 sets of 12 reps per leg
- Advanced: 5 sets of 15 reps per leg
Common Mistakes in Lunges (and How to Fix Them)
🚫 1. Letting the Front Knee Go Too Far Forward
❌ If the front knee extends past the toes, excessive pressure is placed on the knee joint.
✅ Keep the knee directly above the ankle.
🚫 2. Leaning Too Far Forward
❌ Excessive forward leaning shifts pressure from the legs to the lower back.
✅ Keep your back straight and focus your gaze forward.
🚫 3. Taking Steps That Are Too Short or Too Long
❌ Steps that are too short put unnecessary strain on the knees, while steps that are too long reduce balance.
✅ Adjust the step length to around 60-70 cm (24-28 inches).
🚫 4. Locking the Knee When Returning to the Starting Position
❌ Locking the knee puts unnecessary stress on the joint.
✅ Keep the knee slightly bent at all times.
Lunge Variations to Increase Intensity
✅ 1. Standard Lunge (Forward Lunge): Step forward; ideal for beginners.
✅ 2. Reverse Lunge: Step backward; puts less strain on the knee.
✅ 3. Side Lunge: Focuses more on the inner and outer thigh muscles.
✅ 4. Jump Lunge: Increases explosive power and burns fat.
✅ 5. Dumbbell Lunge: Adds resistance for increased strength and muscle growth.
✅ 6. Barbell Lunge: A more advanced variation for serious bodybuilders.
Recommended Workout Plan for Progressing in Lunges
- 🔹 Week 1-2: 3 sets of 10 reps per leg
- 🔹 Week 3-4: 4 sets of 12 reps per leg
- 🔹 Week 5-6: 5 sets of 15 reps per leg
- 🔹 After 6 weeks: Combine different lunge variations for increased intensity
Conclusion: Why Should You Include Lunges in Your Routine?
- ✔️ One of the best exercises for lower-body muscle building
- ✔️ Improves balance, stability, and muscular strength
- ✔️ High fat-burning potential and effective glute and thigh toning
- ✔️ Requires no equipment and can be done anywhere
🎯 Start today and achieve strong legs, toned glutes, and incredible endurance! 💪🔥
Triceps Dips: A Powerful Exercise for Muscle Growth and Strength

Do you want strong, well-defined, and muscular arms?
Are you looking for an equipment-free exercise that you can do at home or the gym?
Triceps dips are one of the best exercises for building massive, powerful arms!
Triceps dips are among the most effective exercises for strengthening the triceps (three-headed arm muscles), deltoids (shoulders), and pectorals (chest muscles). In addition to enhancing upper body strength and endurance, this movement significantly helps sculpt your arms and eliminate excess fat in that area.
In this article, we’ll cover everything you need to know about triceps dips: their benefits, proper execution, common mistakes, variations, intensity-boosting techniques, recommended workout plans, and how to incorporate them into your training routine!
Why Are Triceps Dips One of the Best Upper Body Exercises?
✅ 1. Directly Targeting the Triceps
Dips are one of the most effective exercises for growing and strengthening the triceps, which play a crucial role in arm power and endurance.
✅ 2. Building Upper Body Mass and Strength
This exercise not only works the triceps but also engages the shoulders (deltoids), chest muscles (pectorals), and mid-back muscles (rhomboids and trapezius).
✅ 3. Equipment-Free and Versatile
Triceps dips can be performed anywhere—at home, in the park, or in the gym—using a bench, chair, or parallel bars.
✅ 4. Enhancing Athletic and Functional Performance
This movement improves upper body endurance and enhances performance in sports like swimming, weightlifting, and martial arts.
✅ 5. Strengthening Joints and Preventing Injuries
Regular dips strengthen the elbows, shoulders, and wrists, reducing the risk of joint injuries over time.
How to Perform Triceps Dips Correctly (Step-by-Step Guide)
1️⃣ Bench Dips – Ideal for Beginners
5-1 Starting Position
- Sit on a sturdy bench or chair and place your hands on the edge.
- Fingers should face forward, and hands should be shoulder-width apart.
- Extend your legs and rest your heels on the floor.
5-2 Lowering Phase
- Slowly lower your body until your elbows form a 90-degree angle.
- Keep your back straight and avoid hunching over.
- Engage your arms and shoulders while avoiding unnecessary strain.
5-3 Pushing Up
• Press through your palms and push yourself back up to the starting position.
• Avoid fully locking your elbows at the top to prevent joint strain.
5-4 Recommended Sets & Reps:
- Beginners: 3 sets of 10-12 reps
- Intermediate: 4 sets of 12-15 reps
- Advanced: 5 sets of 15-20 reps
2️⃣ Parallel Bar Dips – For Advanced Athletes
6-1 Grip the Parallel Bars
- Jump up and firmly grip the parallel bars.
- Keep a slight bend in your elbows to avoid locking them.
- Maintain a straight posture with your chest slightly forward.
6-2 Lowering Phase
• Slowly lower yourself until your elbows form a 90-degree angle.
• Keep your elbows moving backward and engage your shoulders.
6-3 Pushing Up
• Press through the bars and push yourself back to the starting position.
• Squeeze your triceps at the top.
6-4 Recommended Sets & Reps:
• Intermediate: 3 sets of 8-10 reps
• Advanced: 4-5 sets of 12-15 reps
Common Mistakes in Triceps Dips (And How to Fix Them)
🚫 1. Locking the Elbows at the Top
❌ This puts excessive pressure on the elbow joints.
✅ Keep a slight bend in your elbows at the top.
🚫 2. Going Too Low
❌ Dropping too low can strain the shoulders.
✅ Lower only until your elbows are at a 90-degree angle (unless you have high flexibility).
🚫 3. Leaning the Head and Neck Too Far Forward
❌ This adds unnecessary strain on the cervical spine.
✅ Keep your head aligned with your spine.
🚫 4. Incorrect Hand Placement
❌ Placing your hands too far apart or too close together shifts focus from the triceps.
✅ Maintain a shoulder-width grip.
Triceps Dip Variations for Increased Intensity
✅ 1. Bench Dips – Ideal for beginners.
✅ 2. Parallel Bar Dips – More challenging and effective.
✅ 3. Weighted Dips – Use a weighted belt or dumbbell for muscle growth.
✅ 4. Explosive Dips – Push yourself up explosively to improve power.
✅ 5. Single-Leg Dips – Perform dips with one leg elevated for extra difficulty.
Recommended Training Plan for Triceps Dips Progression
- 🔹 Week 1-2: 3 sets of 10 reps
- 🔹 Week 3-4: 4 sets of 12-15 reps
- 🔹 Week 5-6: 5 sets of 15-20 reps
- 🔹 After 6 weeks: Combine different dip variations to increase intensity.
Conclusion: Why You Should Add Triceps Dips to Your Routine
- ✔️ Best exercise for building powerful triceps and upper body strength
- ✔️ No equipment needed—train anytime, anywhere
- ✔️ Improves endurance and burns fat in the arms
- ✔️ Suitable for all fitness levels
🎯 Start incorporating triceps dips into your workouts today and build stronger, more defined arms! 💪🔥
Plank: An Amazing Exercise for Strengthening Core Muscles and Sculpting Your Abs!
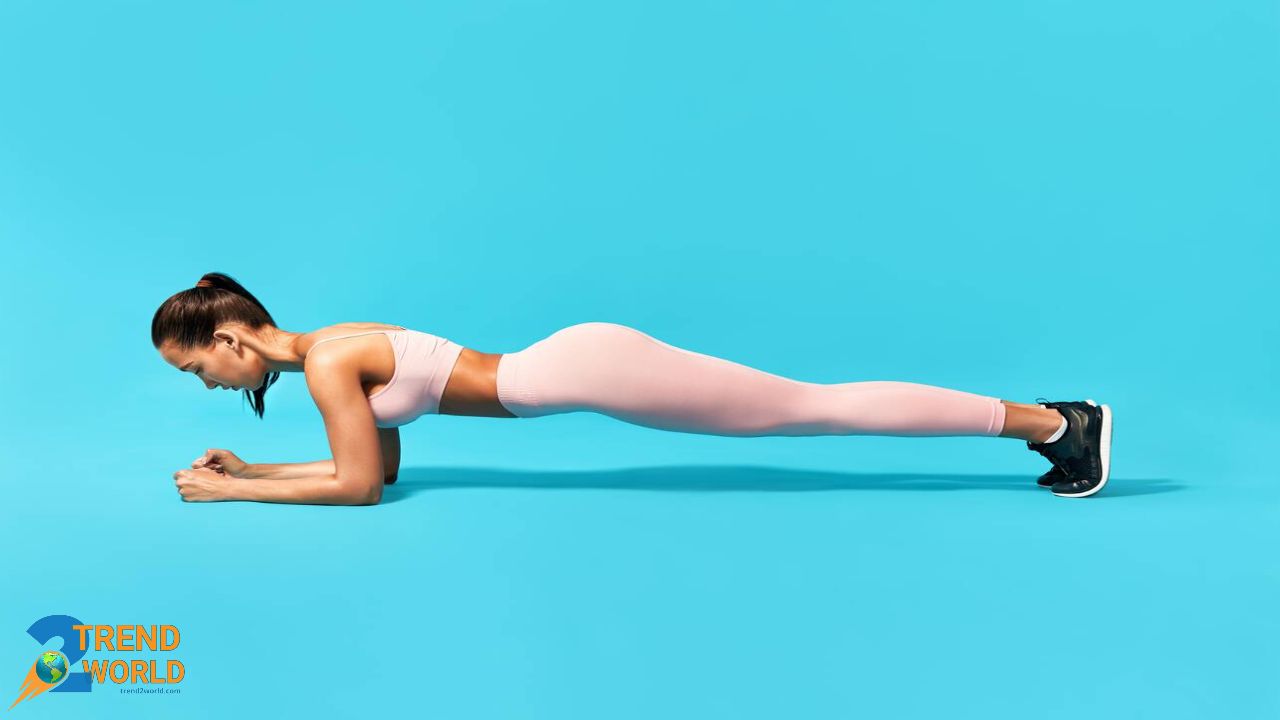
Do you want a flat, strong, and muscular stomach?
Are you looking to strengthen your core muscles without any equipment?
The plank is one of the most effective exercises for strengthening the abs, lower back, and entire body!
Plank is one of the best isometric exercises, performed statically, that significantly improves core strength, endurance, and body balance. This exercise does not put excessive pressure on the spine while engaging the abs, lower back, shoulders, and even legs.
In this article, we will explore every detail about the plank: its benefits, proper execution, common mistakes, different variations, intensity progression, training programs, and essential tips to enhance performance and prevent injuries.
Why is the Plank One of the Best Exercises for Core and Abs?
✅ 1. Strengthening Core Muscles
The plank effectively strengthens the abs, lower back, pelvis, and even shoulders. The involved muscles include:
- Rectus Abdominis – The front abdominal muscles responsible for creating a six-pack.
- Obliques – Side abdominal muscles that enhance body stability and shape.
- Transverse Abdominis – The deepest abdominal muscle, crucial for spinal stability.
- Erector Spinae (Lower Back Muscles) – Helps prevent back pain and maintain balance.
Shoulders & Arms – The plank engages the deltoids (shoulders) and triceps (arms).
✅ 2. Improves Balance and Stability
The plank strengthens stabilizing muscles, playing a key role in balance and movement coordination.
✅ 3. Enhances Posture and Reduces Back Pain
By strengthening core muscles, the plank prevents excessive spinal curvature and improves sitting and standing posture.
✅ 4. Boosts Fat Burning & Abs Definition
Although the plank does not burn as many calories as cardio, it increases metabolism and supports fat loss in the abdominal area.
✅ 5. No Equipment Needed & Can Be Done Anywhere
One of the biggest advantages of the plank is its versatility – it can be performed anywhere without the need for any equipment.
How to Perform the Plank Correctly (Step-by-Step Guide)
🟢 Elbow Plank – The Most Common Version
7-1 Starting Position
- Lie face down on the floor.
- Place your forearms on the ground, ensuring elbows are directly under your shoulders.
- Keep your legs straight, supporting yourself on your toes.
7-2 Lifting Your Body
- Lift your body off the ground, resting on your forearms and toes.
- Keep your head, neck, back, and legs in a straight line.
- Engage your abs and prevent your hips from sagging.
7-3 Holding the Position
- Maintain this position while breathing deeply and evenly.
- Keep your gaze downward and your neck neutral.
7-4 Plank Duration Based on Level
- Beginners: 20-30 seconds
- Intermediate: 45-60 seconds
- Advanced: 90 seconds or more
Repetitions:
• 3 to 4 sets, with 30-second rest between each set.
Common Plank Mistakes (and How to Fix Them)
🚫 1. Letting the Hips Drop
❌ This mistake puts excessive pressure on the lower back and reduces effectiveness.
✅ Keep your hips aligned with your shoulders and feet.
🚫 2. Raising the Hips Too High
❌ If your hips are too high, the strain shifts from your abs to your shoulders.
✅ Maintain a straight body line.
🚫 3. Holding Your Breath
❌ Many people hold their breath during planks, which reduces oxygen supply to muscles.
✅ Breathe deeply and consistently.
🚫 4. Locking the Elbows or Overloading the Hands
❌ Locking the elbows puts too much pressure on the joints.
✅ Keep your elbows slightly bent and distribute weight evenly.
Plank Variations to Increase Intensity
- ✅ 1. Elbow Plank – Standard version, suitable for all levels.
- ✅ 2. High Plank – Similar to a push-up position, adding more pressure on the shoulders and arms.
- ✅ 3. Side Plank – Focuses on strengthening the obliques.
- ✅ 4. Dynamic Plank – Alternating between forearm and high plank.
- ✅ 5. Plank with Leg Lifts – Engages the glutes and legs more.
- ✅ 6. Weighted Plank – Adds extra resistance for increased intensity.
Suggested Training Plan for Plank Progression
- 🔹 Week 1-2: 3 sets, 30 seconds each.
- 🔹 Week 3-4: 4 sets, 45 seconds each.
- 🔹 Week 5-6: 5 sets, 60 seconds each.
- 🔹 After 6 Weeks: Incorporate plank variations to further challenge yourself.
Conclusion: Why You Should Add Planks to Your Routine
- ✔️ The best exercise for core and abs strength
- ✔️ Improves balance, power, and endurance
- ✔️ Reduces back pain and enhances posture
- ✔️ Requires no equipment and can be done anywhere
🎯 Start doing planks today and achieve a stronger, more defined body! 💪🔥
What People Who Tried This Method Are Saying! (Social Proof)
🚀 “I couldn’t believe I could build muscle without weights, but these exercises truly worked wonders! After 6 weeks, my body had completely transformed.” – Ali, 32 years old
🔥 “This workout program changed my life! Now, I feel stronger and more energetic every day, and my confidence has skyrocketed.” – Maryam, 28 years old
💪 “I always thought I could only build muscle at the gym, but this program proved me wrong! I’ve seen amazing results.” – Saman, 35 years old
📈 “I started this program just to try it out, but now, after 3 months, my body has never looked better!” – Nader, 29 years old
Our recommended product for you to have the best yoga experience – click on the image below!
Trending Home! Our top fitness, health, and yoga picks are flying off the shelves—don’t miss out!
Grab yours before it’s too late!
 At
At